| 10210 Systems Parkway, Suite 390 Sacramento, CA 95827 |
|
| cd1@catalinadirect.com | |
| 1-800-959-SAIL (7245) |
How to Print a Shipping Label
You no longer need to export your orders to a seperate program to print shipping labels. With Easypost you print labels directly from the CFWebstore admin and automatically record the tracking code to the order.
There's two Ship Box methods for printing labels. We'll go through both
USE SHIPPER DEFINED PACKAGE
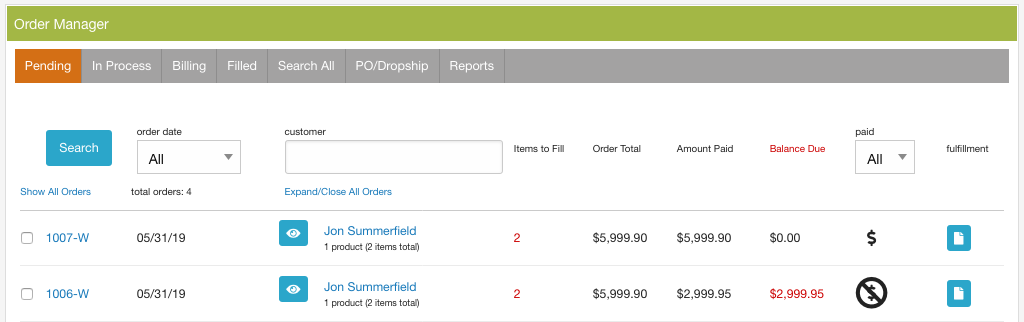
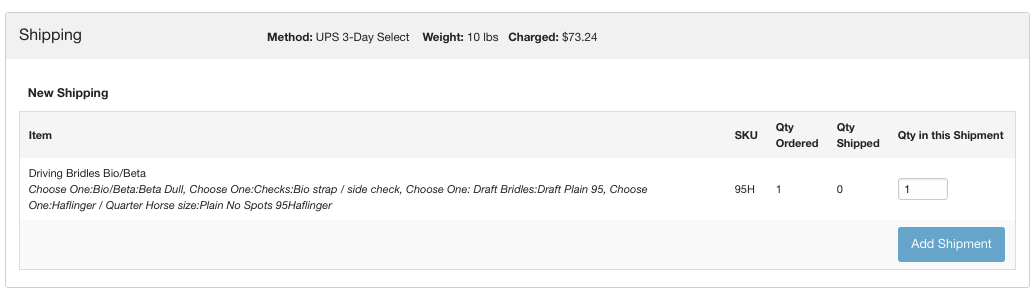
- Edit the order in the Order Manager.
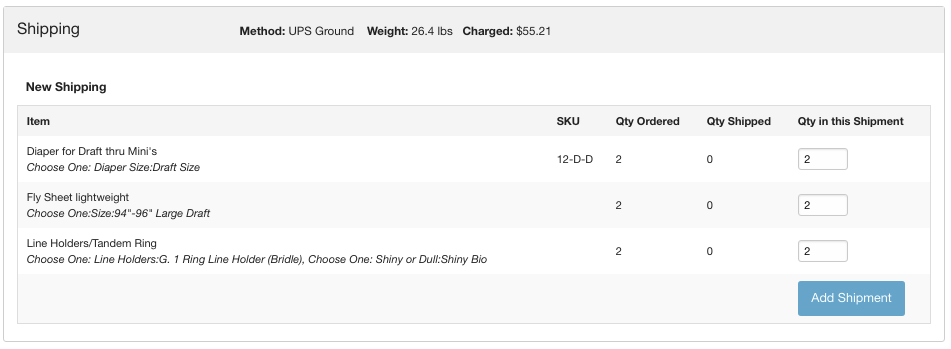
- Create a shipment by selecting the items that will go in the package and click 'Add Shipment'.
- Start a label by clicking the button 'Create Postage Label'.

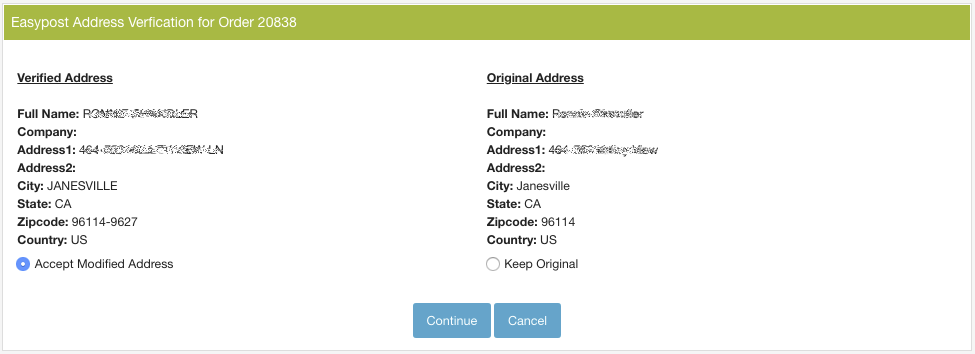
- Choose the address you want to use. Click 'Continue'.
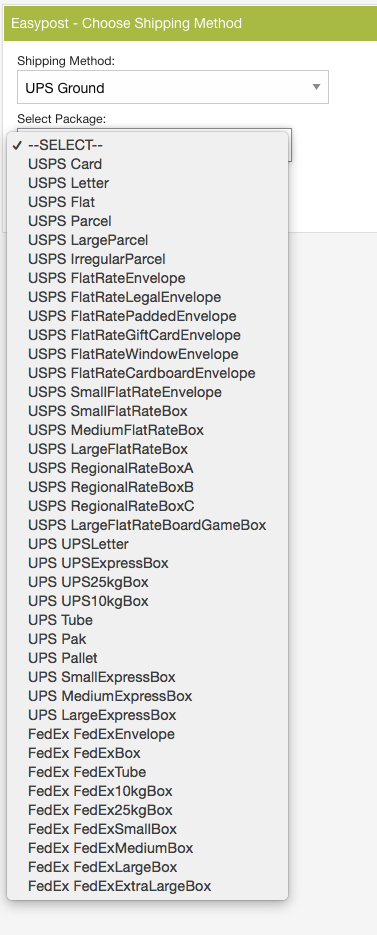
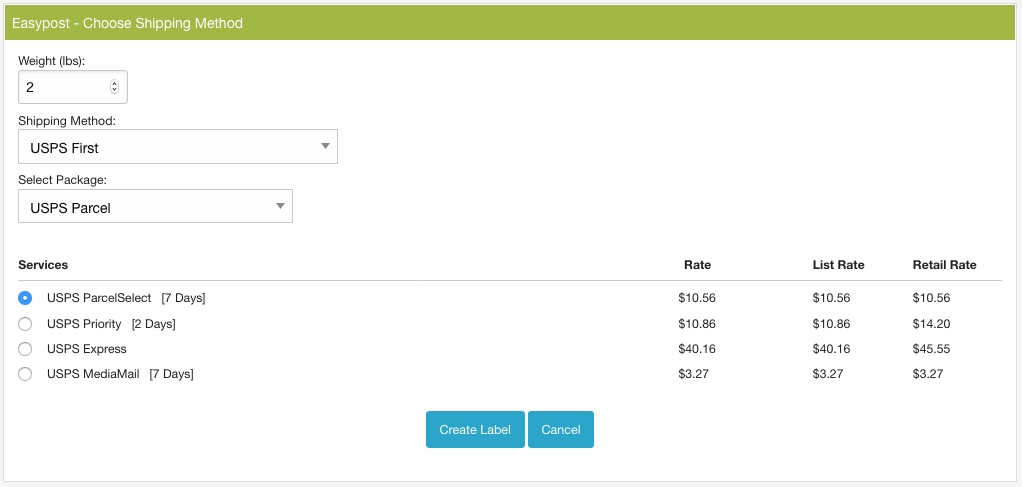
- Now choose your Shipping Method, Package, and enter the weight. The list of predefinded packages already have listed dimensions.
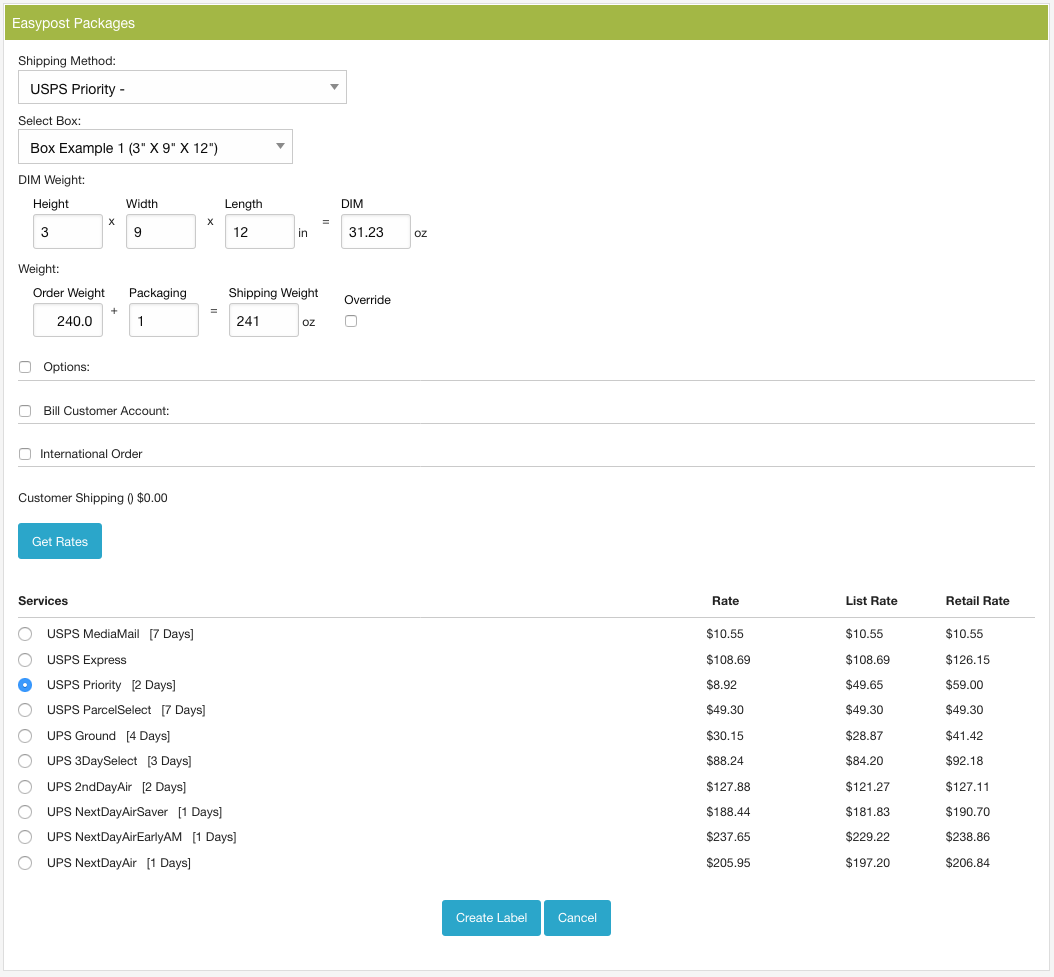
- The page will refesh and you will see a list of rates and methods. Check the method you want and click 'Create Label'. There are three rate types shown:
- Rate - Actual rate that you pay for the label.
- List Rate - Published non-discounted rate that anyone with an account will recieve. This is what the customer sees in the shopping cart.
- Retail Rate - The amount a customer would get at the post office or on the shipper's website.
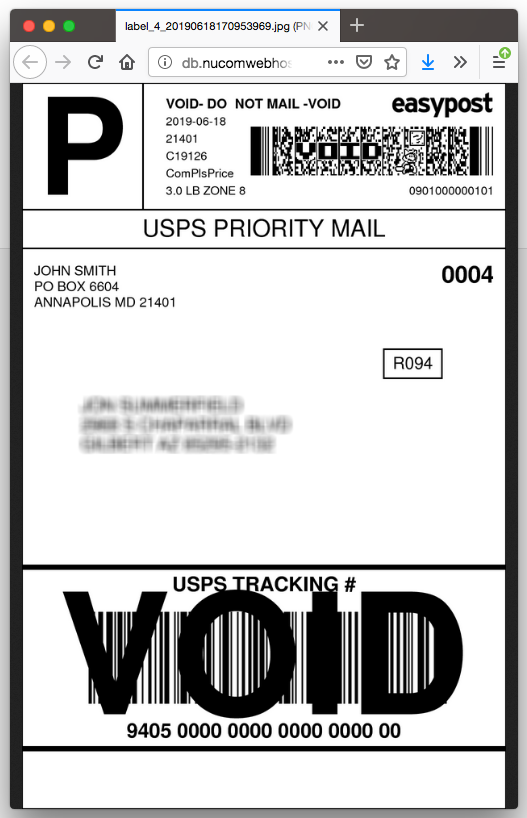
- The label has been created and downloaded as a PDF. If you have 'Email Customer' or 'SMS Customer' set in your Easypost Settings, then the email or SMS will be sent at this time.
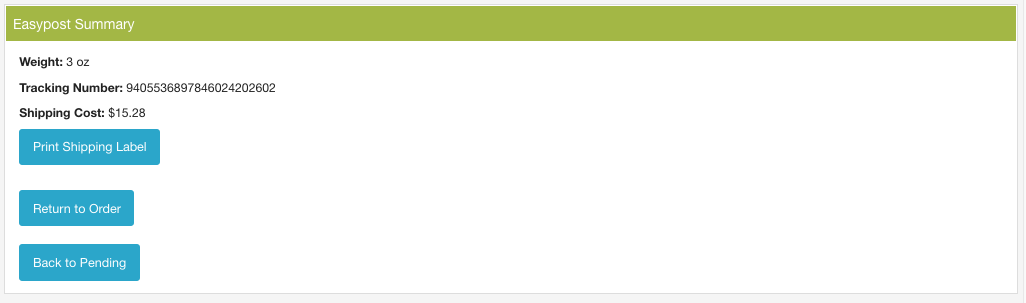
- Click 'Print Shipping Label' to print the label. We recommend you use a Zebra Label Printer.
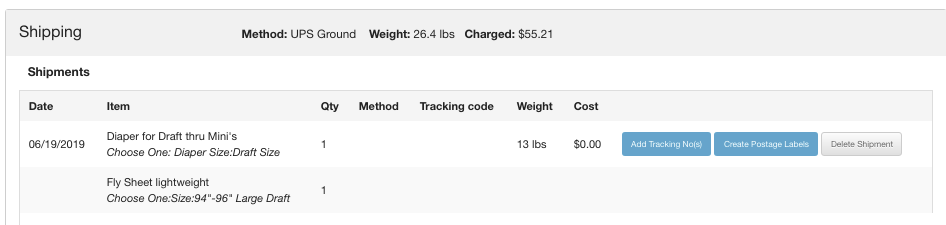
- If you return to the order you can delete the label if you made a mistake. This will void the label charge at Easypost. You can then create a new label.
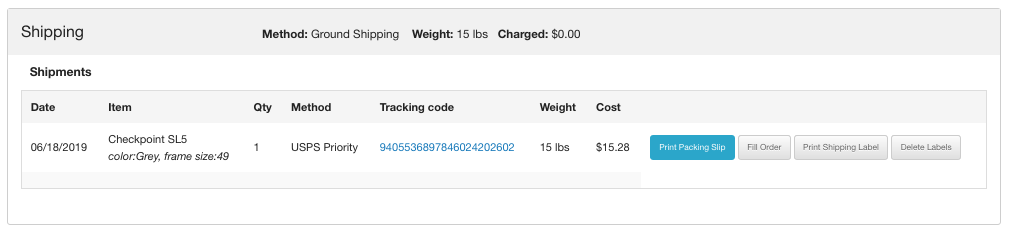
- Click 'Fill Order' and you're done.
USE MERCHANT CUSTOMER PACKAGE
- Edit the order in the Order Manager.
- Create a shipment by selecting the items that will go in the package and click 'Add Shipment'.
- Start a label by clicking the button 'Create Postage Label'.
- Choose the address you want to use. Click 'Continue'.
- Make your label choices and click 'Get Rates'.
- Shipping Method: Choose the shipper method you want to use.
- Select Box: Choose one of your predefined boxes, it will automatically fill in the DIM Weight fields.
- DIM Weight: You can manually enter the dimensions of your shipping box.
- Weight: Order weight and packaging weight will be filled in automatically if you're using a predefined box. If not, then order weight will be filled in automatically and you can manually add the packaging weight.
- Override: If the DIM weight is higher than the actual weight of the package then the DIM weight is used to generate the label rates. If you check override, then the field Shipping Weight will be used. NOTE: Your shipping company will charge you additional fees if the price of the label is low.
- Options
- Add Signature Confirmation
- Residential - Uncheck for commercial address.
- Bill Customer Account - Allows you to ship on the customers shipper account, UPS only.
- UPS Account ID
- Country
- Postal Code
- International Order - International orders require additional paperwork. You will need to add the HS code number to each of your products to have it filled in automatically here.
- Quantity:
- Description:
- Weight:
- Value:
- Country of Origin:
- HS Code:
- Contents Type:
- Customer Shipping: This will show you the shipping method and price the customer paid in the shopping cart. This is just for reference when choosing a rate and method for shipping.
- The page will refesh and you will see a list of rates and methods. Check the method you want and click 'Create Label'. There are three rate types shown:
- Rate - Actual rate that you pay for the label.
- List Rate - Published non-discounted rate that anyone with an account will recieve.
- Retail Rate - The amount a customer would get at the post office or on the shipper's website.
- The label has been created and downloaded as a PDF. If you have 'Email Customer' or 'SMS Customer' set in your Easypost Settings, then the email or SMS will be sent at this time.
- Click 'Print Shipping Label' to print the label. We recommend you use a Zebra Label Printer.
- If you return to the order you can delete the label if you made a mistake. This will void the label charge at Easypost. You can then create a new label.
- Click 'Fill Order' and you're done.