| 10210 Systems Parkway, Suite 390 Sacramento, CA 95827 |
|
| cd1@catalinadirect.com | |
| 1-800-959-SAIL (7245) |
Overview
The Main Settings control a wide variety of options for your store. These will often have site-wide effects on how your store will work so take your time and make sure you understand what each does! You’ll find this option under Site Design on the admin menu. Let’s go over each of the settings available here, by the sub-section they are organized into:
Store Location
- Site Name: This is the name you wish to use for your store. It will appear on the title of the website and will be used in emails to your customers.
- Address: Your merchant address as you would like it in email confirmations, can also be used in footers for your store.
- Suite, Apt:
- City:
- State / Province:
- Zip / Postal Code:
- Home Country: Select your home country. The home country is used to determine domestic versus international rates and will appear first on the country list on order forms.
- Company Phone:
- Custom Merchant: Add your hours of operation, fax number - anything that doesn't fit above. Will be shown various places.
- Google Map Embed: If entered, will be used with store location.
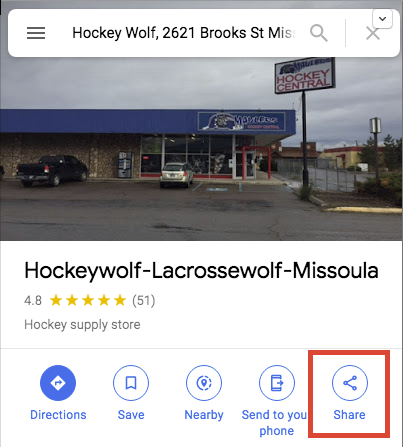
- Go to https://maps.google.com
- Enter your address including your store name.
- Click on 'Share'
- Click 'Embed a map' and then 'Copy HMTL'
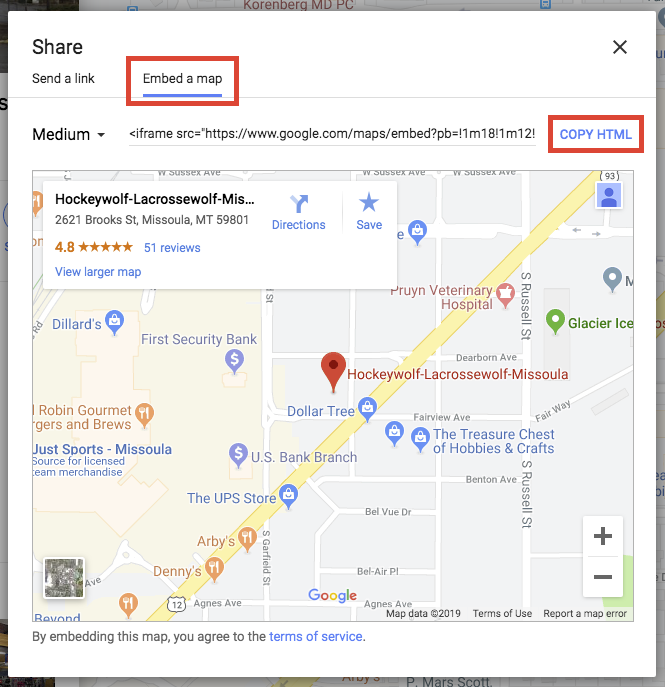
- Paste the code into your store and then make one change. Change 'width="600"'
to
STORE SETTINGS
- Locale: The locale is used by the ColdFusion server to determine how to format your numbers and dates. Select the most appropriate locale for your home country.
- Units of Money/Weight/Size: This is the text used in the store to describe your units of weight, size and money. These are used for displaying this information in admin forms and to the customer and should match your Locale settings.
- Open Admin Links in New Windows: When you click on an admin link, it will open a new window.
- Exclude IP from Errors: Used for troubleshooting. Enter you IP address and you'll skip the CFWebstore error routine. Single IP only.
EMAIL SETTINGS
- Company Email: This is the email used for order confirmations and other correspondence with customers.
- Webmaster Email: The webmaster email is used for error reports from your site.
- SMTP Server: If not configured in your ColdFusion Administrator, enter your SMTP server address here for sending store emails.
- SMTP Port: The port for your SMTP server.
- SMTP Username: If your SMTP sever requires authentication, enter the username here.
- SMTP Password: The SMTP password, if using authentication.
- Add Customers to Mailing List: This is a Nucom Service that allows you to automatically add your customers to Mailchimp or Constant Contact account. Sign-up for the Nucom Service.
SEARCH SETTINGS
- Search Content: Limit what should be searched.
- Show Categories: If yes, you'll see a category dropdown on the search bar.

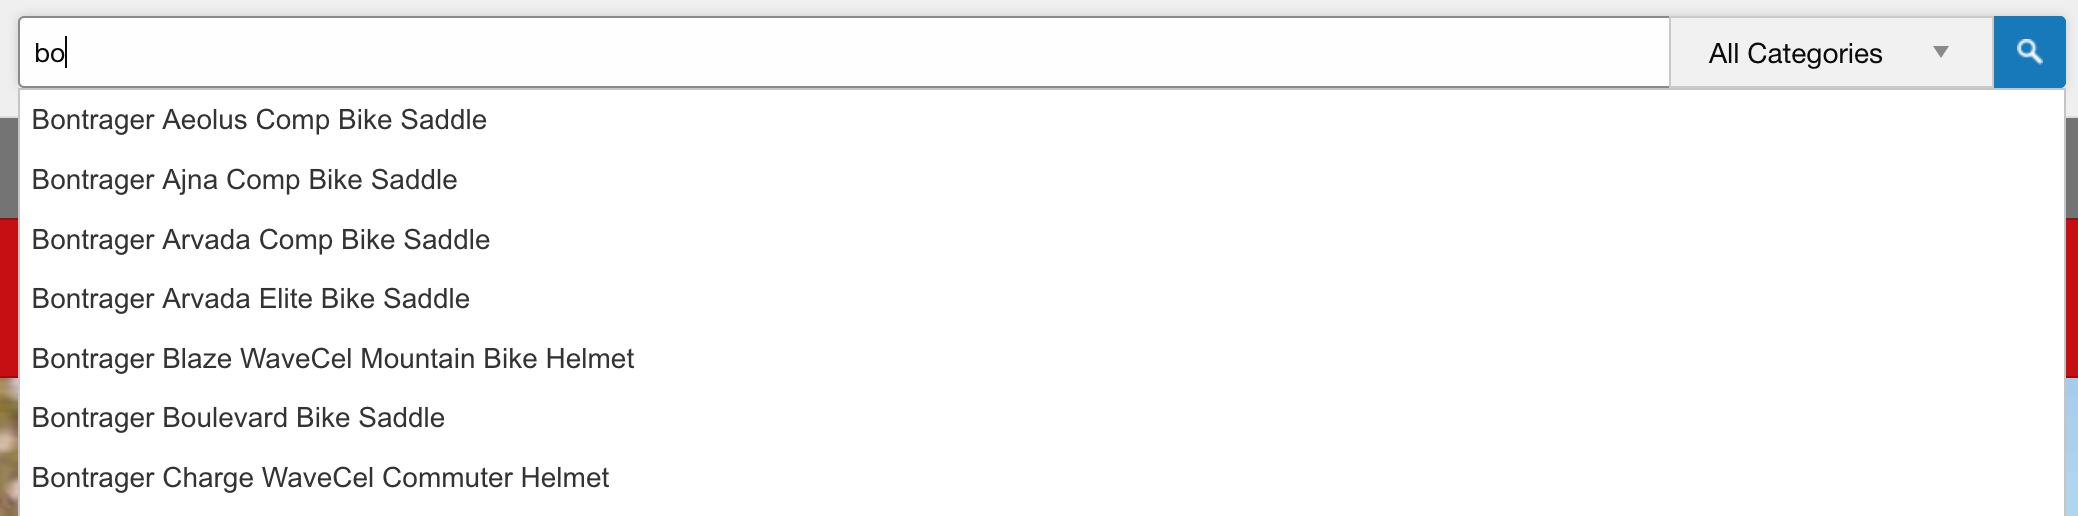
- Product Autocomplete: If yes, when you start typing in the search box, it shows you product suggestions.
- Search Type: You can choose to use an sql database search or the search engine SOLR that's built into Coldfusion. You may need your hosting company to setup SOLR for you. If using SOLR you need additional setup in the Admin > Settings > SOLR
LAYOUT SETTINGS
- Site Logo (Desktop): This is the default website logo and will be used in all instances unless additional logos are specified below.
- Site Logo (Mobile): Add a smaller, flatter logo for the mobile site. Currently, the mobile logo is limited to 50px high.
- Site Logo (Print): Recommeded you use a black & white image for better print quality.
- Images Directory: This is the root folder where the site looks for images. Don't change unless you know what you're doing.
- Default Fuseaction: Generally your home page.
- Default Columns: Divide your content into columns. Can be overwritten at the category level.
CATEGORIES
- Default Side Menu Style: Applies if using 'left column' layout under Color Palette.
- Default Sub-Cat Menu Style: Only applies if using 'product w/ side menu' template under categories.
- Default Category Style: This applies to the layout of sub-categories.
FEATURES
- Root Category (Features): Used to determine the home category for your features for navigation links in your store.
- Max Features: The maximum number of features that will display on one page. The customer will receive links to additional pages of features once the maximum is reached.
- Show Features on Off Categories: If a feature is in multiple categories and one of the categories is set 'display=no' then that product will be turned off in all categories by default (no).
PRODUCTS
- Root Category (Products): Used to determine the home category for your products for navigation links.
- Cache Products: This setting will allow your categories to cache the product queries so as to lower the amount of database calls needed. This is particularly helpful for sites will lots of products and busy traffic. Please note that you will need to manually reset the cached data after adding or editing products.
- Inventory Control: This sets whether inventory tracking is used and at what level products are removed from inventory. None will turn off all inventory tracking features. Store will remove products from inventory as soon as an order is placed in the store. Admin will remove products once the order is marked as Filled or In Process. Mixed will remove the product when the order is placed for online credit card payments, and when the order is filled for offline payments.
- Use Inventory Tab: Inventory tab in Product Manager will appear. This inventory will override product and option level inventory.
- Show # in Stock: This setting will show the quantity of product in stock to the customer.
- Show Out of Stock: Disabling this will remove products from your store if they are out of stock. If you have this set to ‘No’ be sure to enter stock amounts for all your products or they won’t show up!
- Show Retail Prices: Displays the retail price of products as entered in the Product Pricing screen to the customer (as a comparison for your own store prices).
- Sort Products By: Determines the sort order for products on the category pages. You can sort by the product name or by the product SKU.
- Order, Registry, add to Wish List Button, Text: The text that is displayed on the purchase button for items in your store.
- Order Registry, add to Wish List Button Image: An image that can be used as the button for products that do not have options.
PRODUCT TEASER
- Default Listing Style: The style used to display the products on the category page.
- Always link to product details: By default, if you don't have a large image or long description for a product, it won't link to the product detail page.
- Show Short Desciption: Show the short desciption box on each product on the category page.
- Show Order Box: Show the price, options, and order button under each product on the category page.
- Show Ratings: Show the aggregate rating from customer reviews on each product on the category page.
- Show Icons: Show the Hot, New, and Sale iconson each product on the category page.
- Show SKU: Show the SKU on each product on the category page.
- Show Custom Fields: Show the custom product fields on each product on the category page.
- Image Height: Set a max height to the images and all the product names line up. 300 is a good height limit.
- Grid Style: Basically shows or hides lines between products on the category page.
- Show Products from Off Categories: If a product is in multiple categories and one of the categories is set 'display=no' then that product will be turned off in all categories by default (no).
- Max Products: The maximum number of products that will display on one page. The customer will receive links to additional pages of products once the maximum is reached.
PRODUCT IMAGE SIZES
When you add product images they will automatically get resized to these dimensions. Images are resized proportionally. This means if you image has a 4:3 size ratio, the image will be reduced by the smallest criteria, width or height, but the image will still be in the 4:3 ratio.
- Resize Product Images: When you check this box, all product images that were initially uploaded and resized by the website will be resized again to meet your new critieria. This can take several minutes to perform depending on how many images you have.
FILE TYPES
- Mime Types Allowed: List of mime types allowed for upload and download (be aware of issues with allowing executable types!)
- Extensions Allowed: List of mime types allowed when uploading downloadable products (be aware of issues with allowing executable types!)
SEO
- Permalinks - The permalink is a new feature designed to make semantic or search-engine-friendly URLs. They’re easier to read for people and help improve your SEO rankings on Google and other search engines.
You can choose the default pattern for your URLs and then customize for each individual page, category, blog, feature, or product.
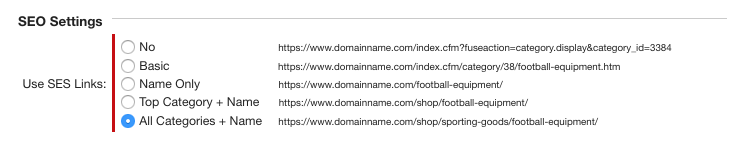
NOTE: This is still a BETA feature. Use at your own risk.
- Meta Description: This is the default meta description that will used on any page where it's not otherwise specified.
- Meta Keywords: This is the default meta keywords that will used on any page where it's not otherwise specified.
FAVICONS
Favicons appear in the address bar of your browser. You can easily get a favicon created in multiple sizes by going to https://www.favicon-generator.org/.
VISITOR TRACKING
- Google Analytics Web Code ID - If you register with Google Analytics you would enter the Code ID here. This will automatically add the ID to each page for analytics tracking.
EXTERNAL LOGINS
You can allow customers to create an account using their Facebook or Google Account.
- Google Client ID:
- Facebook App ID: